Bread in a Bag (Fun, Easy Homemade Yeast Bread!)
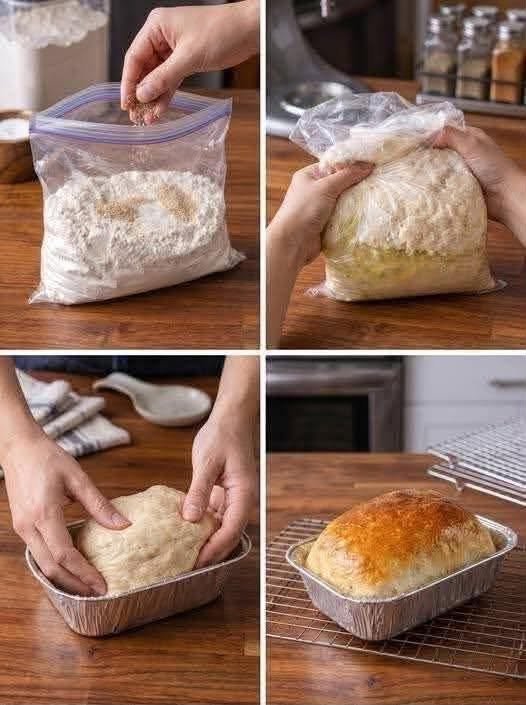
“Bread in a bag” is a classic, wonderfully tactile baking method where all the mixing, kneading, and rising happens right inside a sturdy, ziplock-style plastic bag. It is an absolute favorite for home cooks, kids, and anyone who wants the cozy reward of fresh, warm homemade bread without getting their countertops covered in flour.
Ingredients
-
Warm Water: 1 1/4 cups (warm to the touch, around 40°C to 43°C / 105°F to 110°F)
-
Active Dry Yeast: 1 packet (2 1/4 teaspoons)
-
Sugar: 3 tablespoons (feeds the yeast and adds a hint of sweetness)
-
Oil or Melted Butter: 3 tablespoons vegetable oil, melted butter, or olive oil
-
All-Purpose Flour or Bread Flour: 3 to 3 1/2 cups
-
Salt: 1 teaspoon
-
Extra: A large, heavy-duty 1-gallon ziplock freezer bag
Step-by-Step Instructions
1. Activate the Yeast
-
In your large ziplock bag, combine the warm water, sugar, and active dry yeast.
-
Seal the bag tightly, pressing out as much air as possible, and gently mix with your fingers from the outside.
-
Let the bag sit on the counter for 5 to 10 minutes until the yeast becomes bubbly, frothy, and active.
2. Add the First Round of Ingredients
-
Open the bag and add the oil (or melted butter), salt, and 1 1/2 cups of the flour.
-
Seal the bag securely, making sure most of the air is pushed out.
-
Squish and Knead: Massage the bag with your hands, squishing it vigorously from the outside until the ingredients are thoroughly blended and a loose batter forms.
3. Add the Remaining Flour
-
Open the bag again and add the remaining 1 1/2 to 2 cups of flour.
-
Seal the bag tightly, pressing out any trapped air.
-
Knead in the Bag: Knead the dough from the outside of the bag for 5 to 8 minutes. Work your hands across the bag, pressing, folding, and turning the dough until it pulls away from the sides of the bag and forms a smooth, elastic ball. (If the dough feels too sticky, add 1 tablespoon of flour at a time through the bag).
4. The First Rise
-
Open the bag slightly (leave a tiny 1-inch opening at the corner to let gases escape) and place the bag in a warm, draft-free spot.
-
Let the dough rise for 1 hour, or until it has doubled in size.
5. Shape and Second Rise
-
Punch the air out of the dough right inside the bag, then gently tip the dough out onto a lightly floured surface.
-
Shape the dough into a neat loaf, round boule, or small dinner rolls.
-
Place your shaped dough onto a greased baking sheet or into a greased 8×4-inch loaf pan. Cover loosely with a clean kitchen towel and let it rise a second time for 30 to 45 minutes until puffy.
6. Bake
-
Preheat your oven to 190°C (375°F).
-
Bake the loaf for 25 to 30 minutes (or 15–20 minutes if you made rolls), until the crust is golden brown and the loaf sounds hollow when tapped on the bottom.
-
Brush the hot crust with a little melted butter for a wonderfully soft finish, then let it cool slightly before slicing.
Pro-Tips for Success
-
Check Your Water Temperature: If the water is too hot, it will kill the yeast; if it is too cold, the yeast won’t activate. It should feel like a warm bath—comfortable to the touch, not scorching.
-
Heavy-Duty Bags are Best: Use a thick, freezer-grade gallon bag so it doesn’t puncture or split while you are enthusiastically kneading the dough!
Tip: This is a fantastic recipe to make with kids or anyone wanting to learn the basics of yeast dough without the intimidation factor of traditional hand-kneading.
Are you baking this loaf for a weekend family dinner, or just craving the comfort of fresh homemade bread?
